
ᴋᴘᴏᴘ ᴄᴏᴠᴇʀ & ᴇᴅɪᴛs + ᴛᴜᴛᴏʀɪᴀʟs
ⓑⓔⓖⓘⓝⓝⓔⓡⓢ
ѕєяιєѕ
So hi, to all lovely people on the internet. today, I am going to show you how to edit like aesthetic kpop covers or just purely edit stuff that is aesthetic or pleasing on your eyes. I’ll be showing you how to edit and to make wallpapers. So, for more info. I will make a page for you to understand some stuff you need to know.
I am just an amateur and still keep learning.
~further due let’s get started~
so, this is the pic that I have edited and this is the finished product.
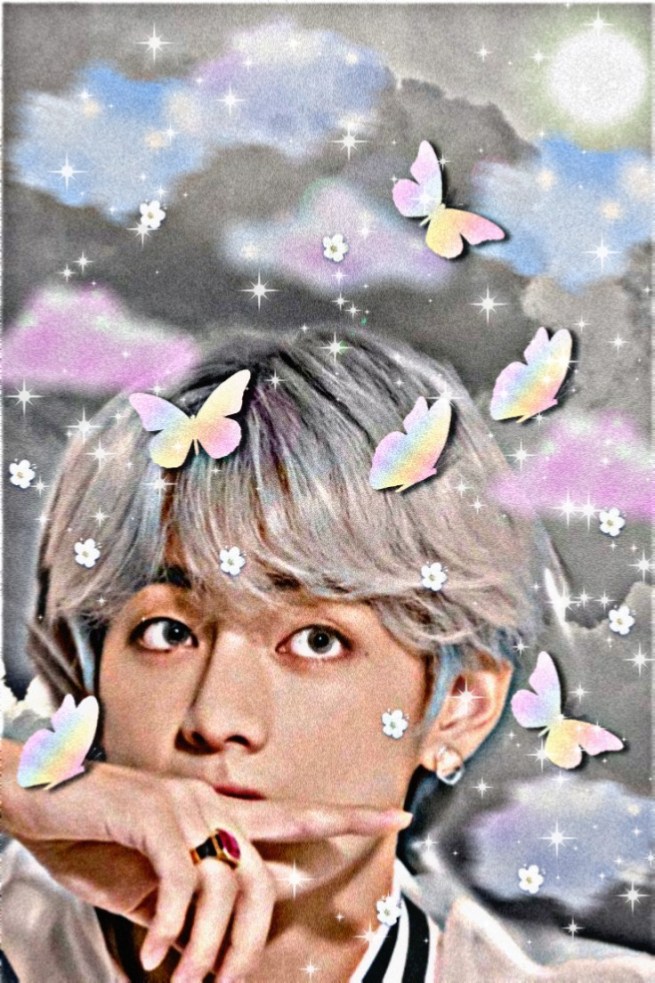
I wanna tell you that this pic that I had shown you is the finished product. I am going to show you a raw edit still using this pic and the background. I’ll show the step by step tutorial that you wouldn’t miss anything.
the steps
1. Open your Picsart app
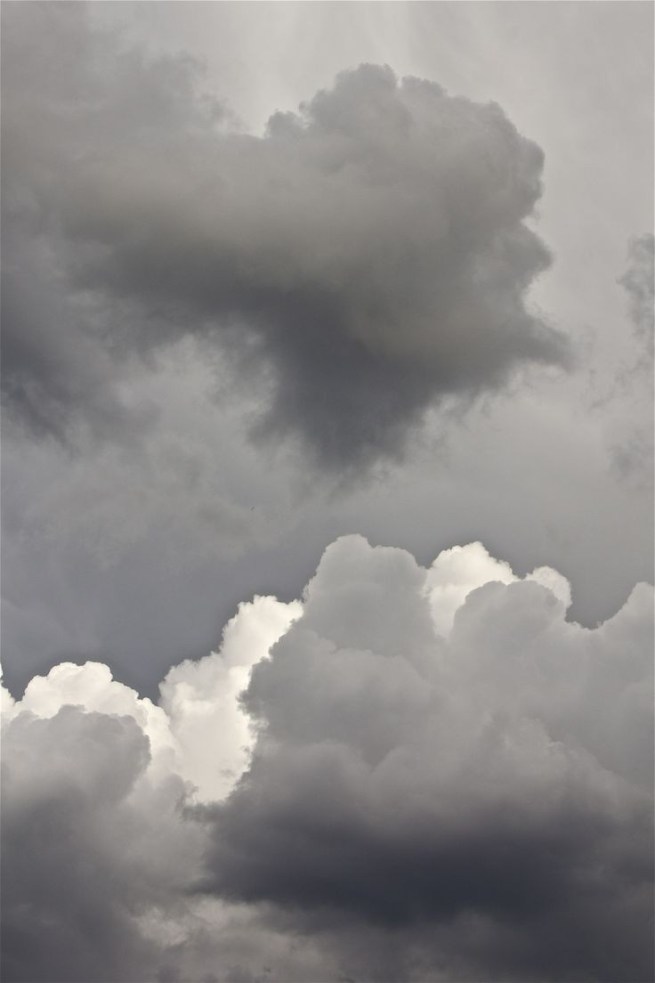
2. choose some pic to be your background
–use Pinterest, Tumblr, WeHeartIt or they are some free edited photos
on Picsart App.
3. find the perfect cover depend on your own chosen photo.
this is my pics.
4.now, you have picked your own background.
clicked [add photo]

5. If you had added the chosen photo clicked CutOut
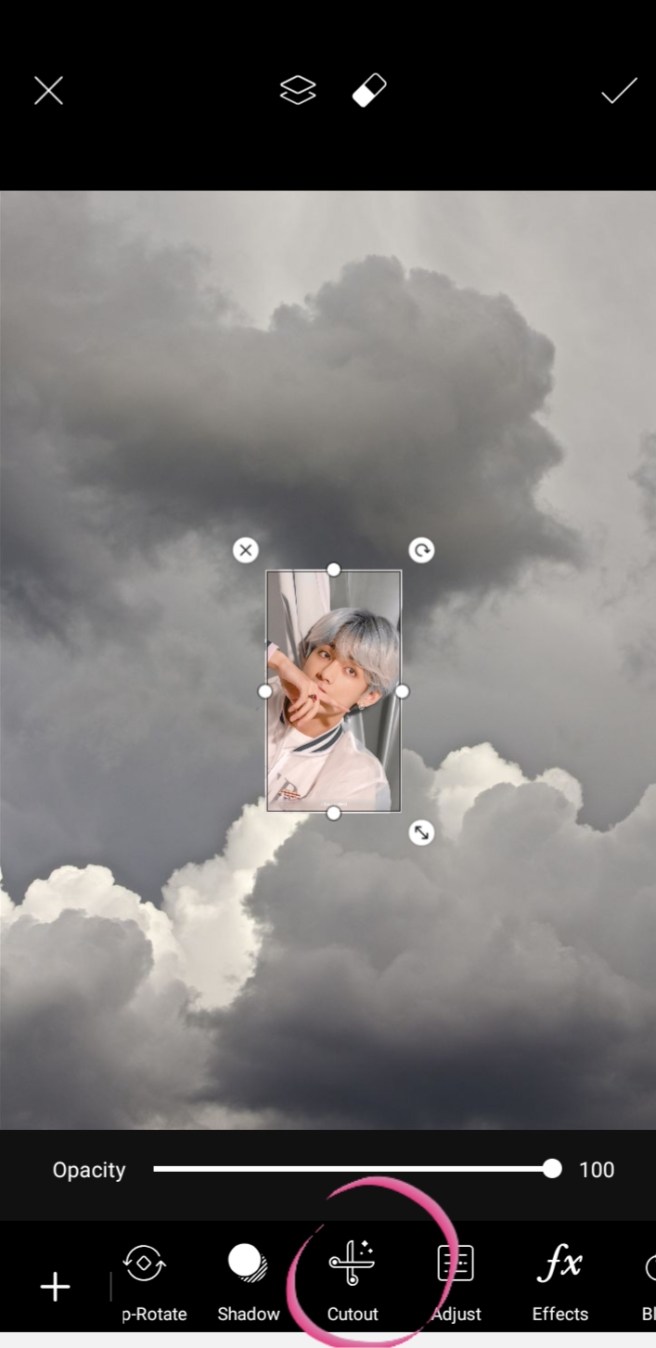
6. You had now clicked the Cutout
– you should click the “Person icon select & Person tap”
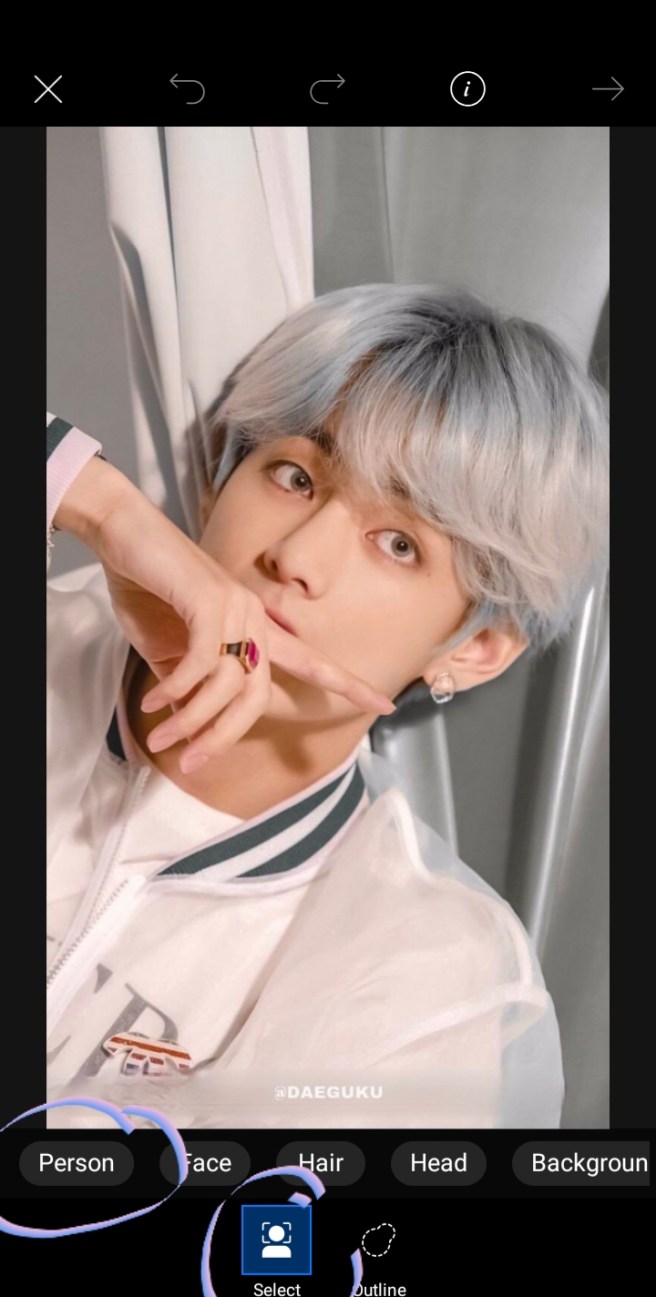
7. After that, your photo will be crop by the app it’s own.
–you could edit it out more by clicking the paint but I’ll tackle that to the next edit.
“erase the excess of your crop”
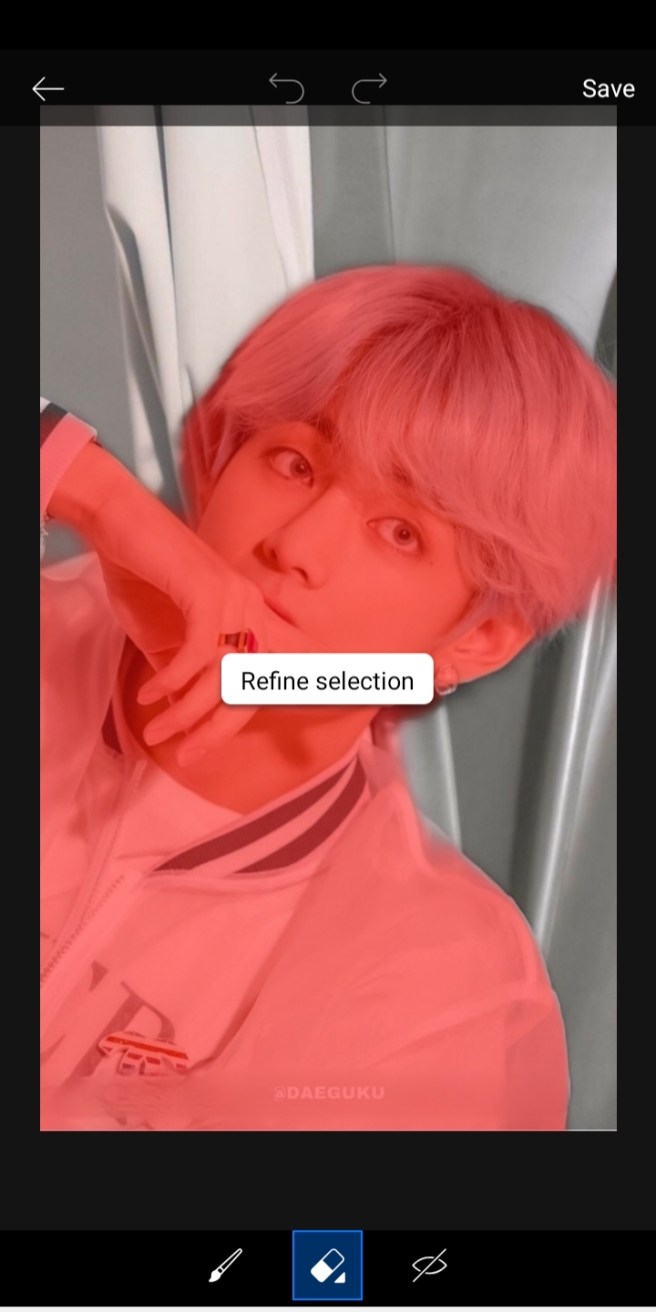
8. Now you have the cutout pic that now looks like a sticker and now it will resonate the background
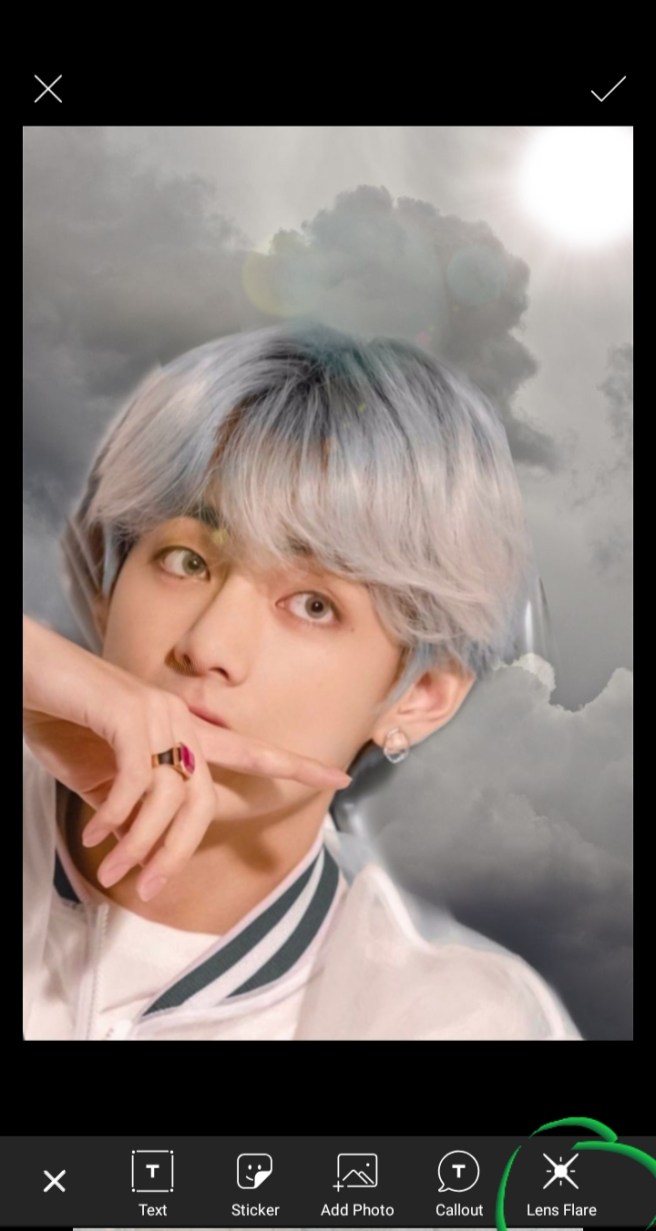
9. To click the “Lens Flare”
I used lens flare to brighten up the pic. it will look more brighten and it will just blend the cutout pic it will not look like some pic edit out.
it’s up to you if you’ll use it but I used it this edit.
this is the flare I chose.

10. Click the “BRUSHES”
–it has cute stickers + I called them stickers. Well they have just cutest background add on.
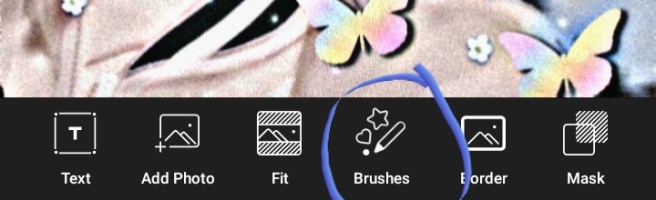
-Just choose some brushes that will make your photo cutesy and I chose;
THE CLOUDS
THE STARS
THE BUTTERFLY
THE WHITE SAKURA FLOWER
SHINE UP SHINES BRUSHES
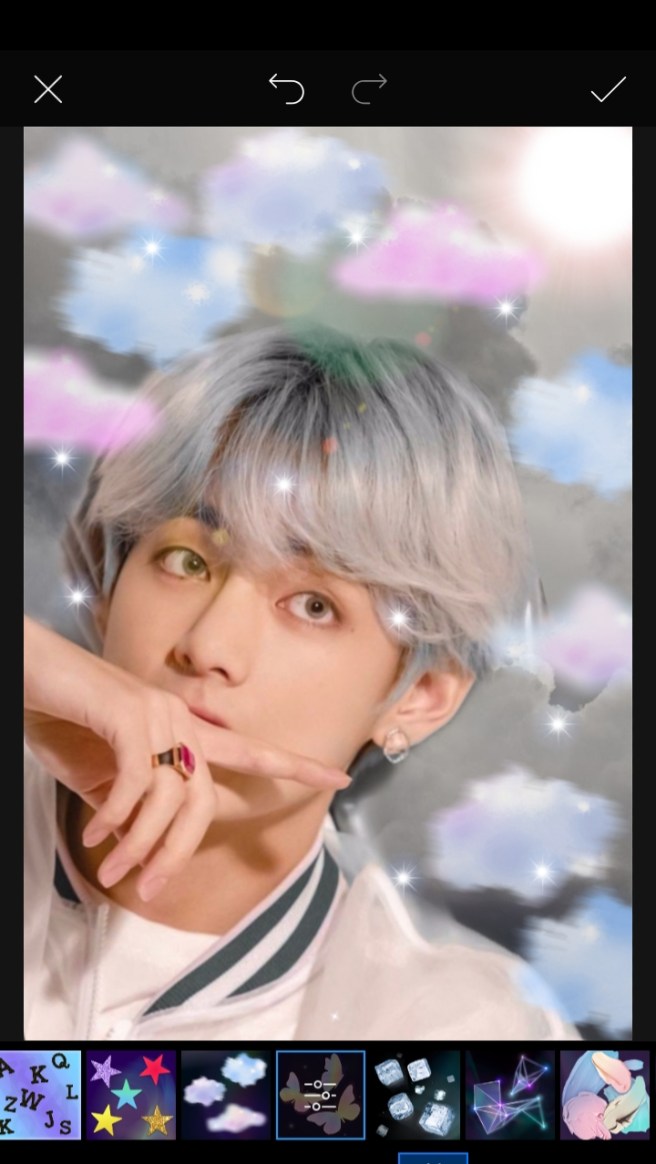
11. It will look like this. So, Click the “EFFECTS”
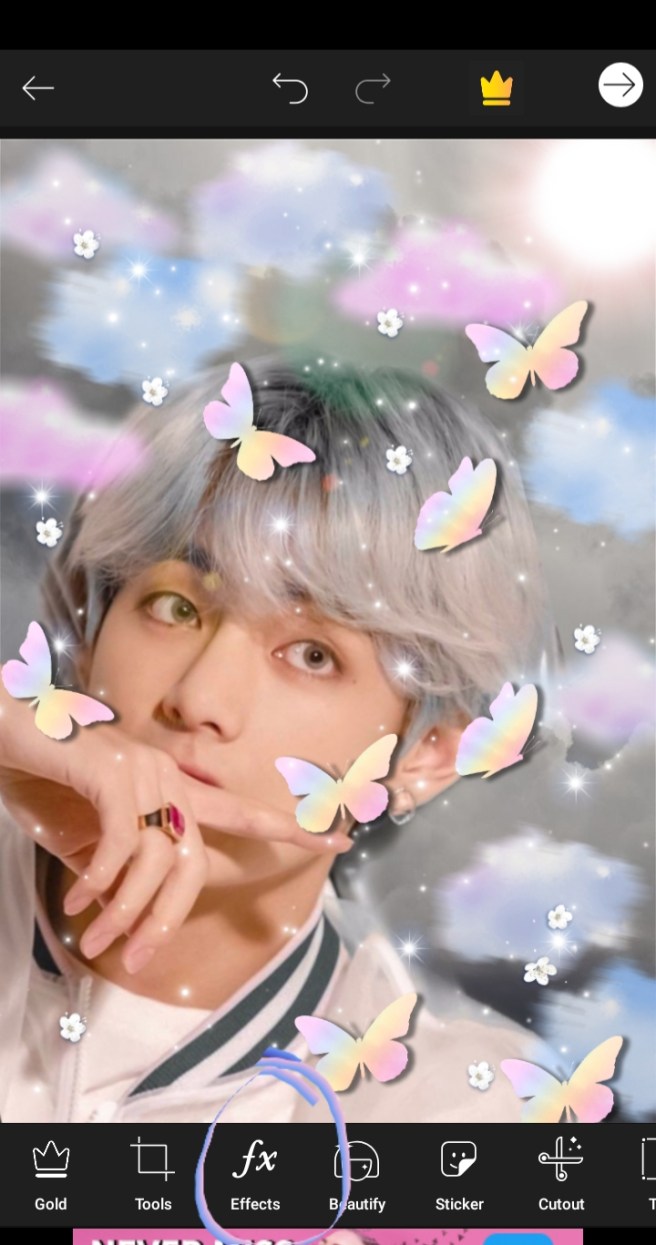
– if you want, you can save the pic cause it’s cute though even though you didn’t use the effects but I have used it in this pic.
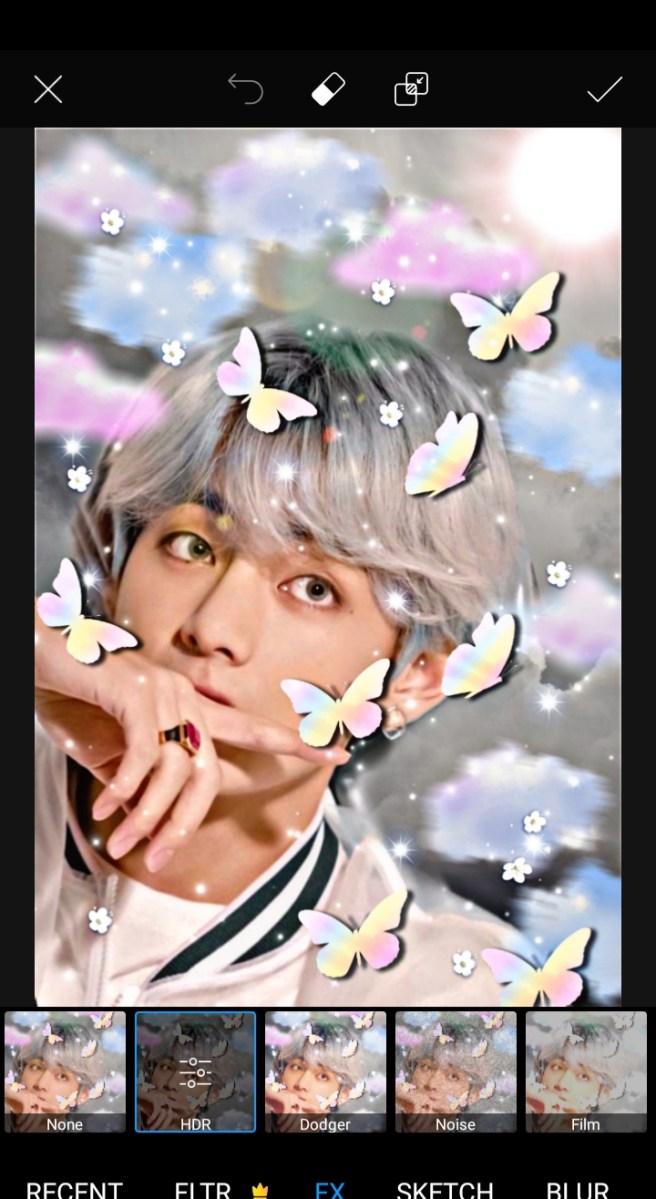
–use the effects of your choice and you are now off to save.
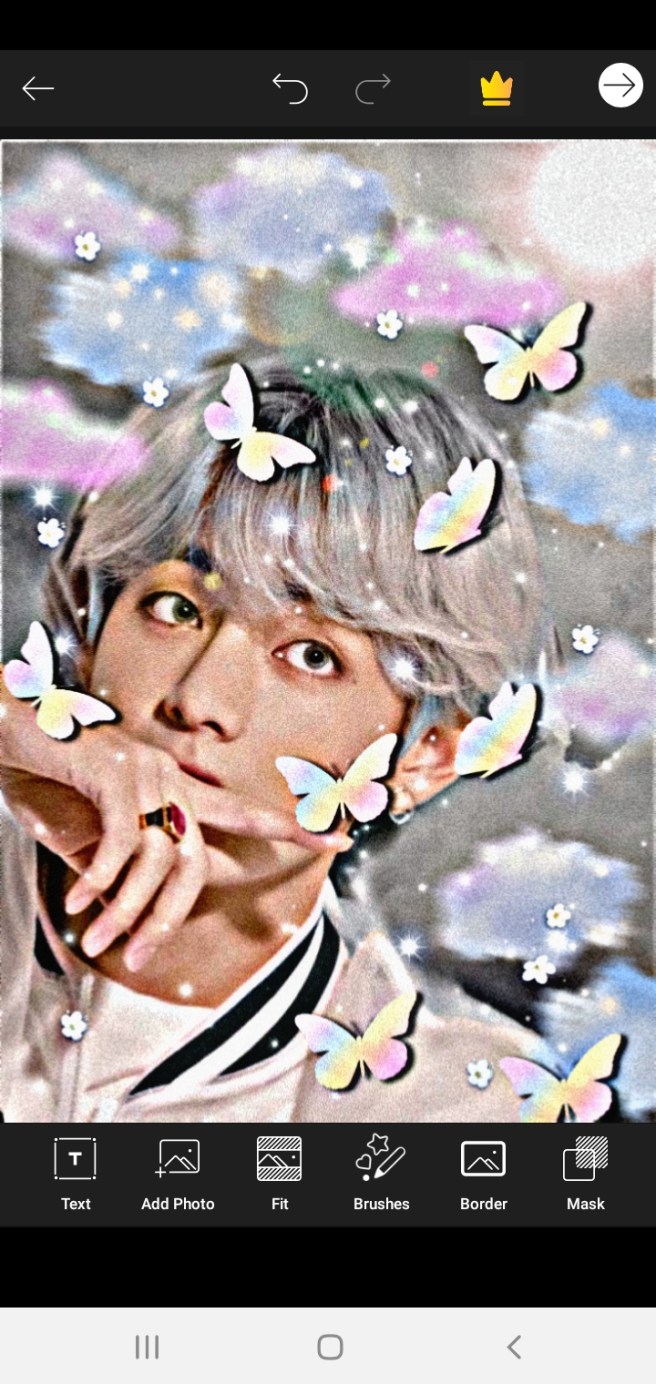
12. It’s done! ~
I hope this is helpful for all of you.
shooky

Hey, I find this quite helpful especially for beginners and they only have a phone to used in editing apps. I find this helpful. By the way I am an army and I wrote some ao3 this will be a helpful tutorial.
LikeLike
Hey jennie, I am grateful you find this helpful. I’ll be grateful to make some more about this.
LikeLike
Amazing editing Cheya! (That Tae pic is beautiful btw). Thank you for sharing these tips.
Btw I too blog @ The Confessions Of A Music And Book Addict and would appreciate some support!
Stay healthy
-Prutha xoxo
LikeLiked by 1 person
Thank you so much Prutha. I’ll make some post similar on this.
Cheya♡
LikeLiked by 1 person